Procedure: Sterilize Tools
Ensure you follow Proc > Clean tools first.
This works because Pressure Cookers Can Adequately Sterilize Tools. If you have an autoclave, use that instead!
Equipment
- Stovetop pressure cooker
- Sterilization pouch
Procedure
These instructions assume a Presto-style stovetop pressure cooker with a weight. An instant pot is NOT adequate for this purpose. Consult IFU for your sterilization pouches to confirm it's the same as written below.
- (Optional) Start some water boiling in an electric kettle, and add a little more to the base of the pressure cooker, and turn the stove on. This will speed things up for later.
- Inspect the pressure cooker lid. You should be able to hold the lid up to the light and see a spot of light through the vent pipe. Take the sealing ring out and wipe it down with a towel (or your shirt) all the way around. Wipe the lid where the ring goes, as well, then put the ring back.
- Add approximately 2cm of distilled water to the base of the cooker. (Use the stuff from the kettle, if you did that.) Ensure that the support dish is covered. The support dish is the only thing that should touch the base of the pressure cooker. If you don't have one, you can improvise with mason jar rings or aluminum cans.
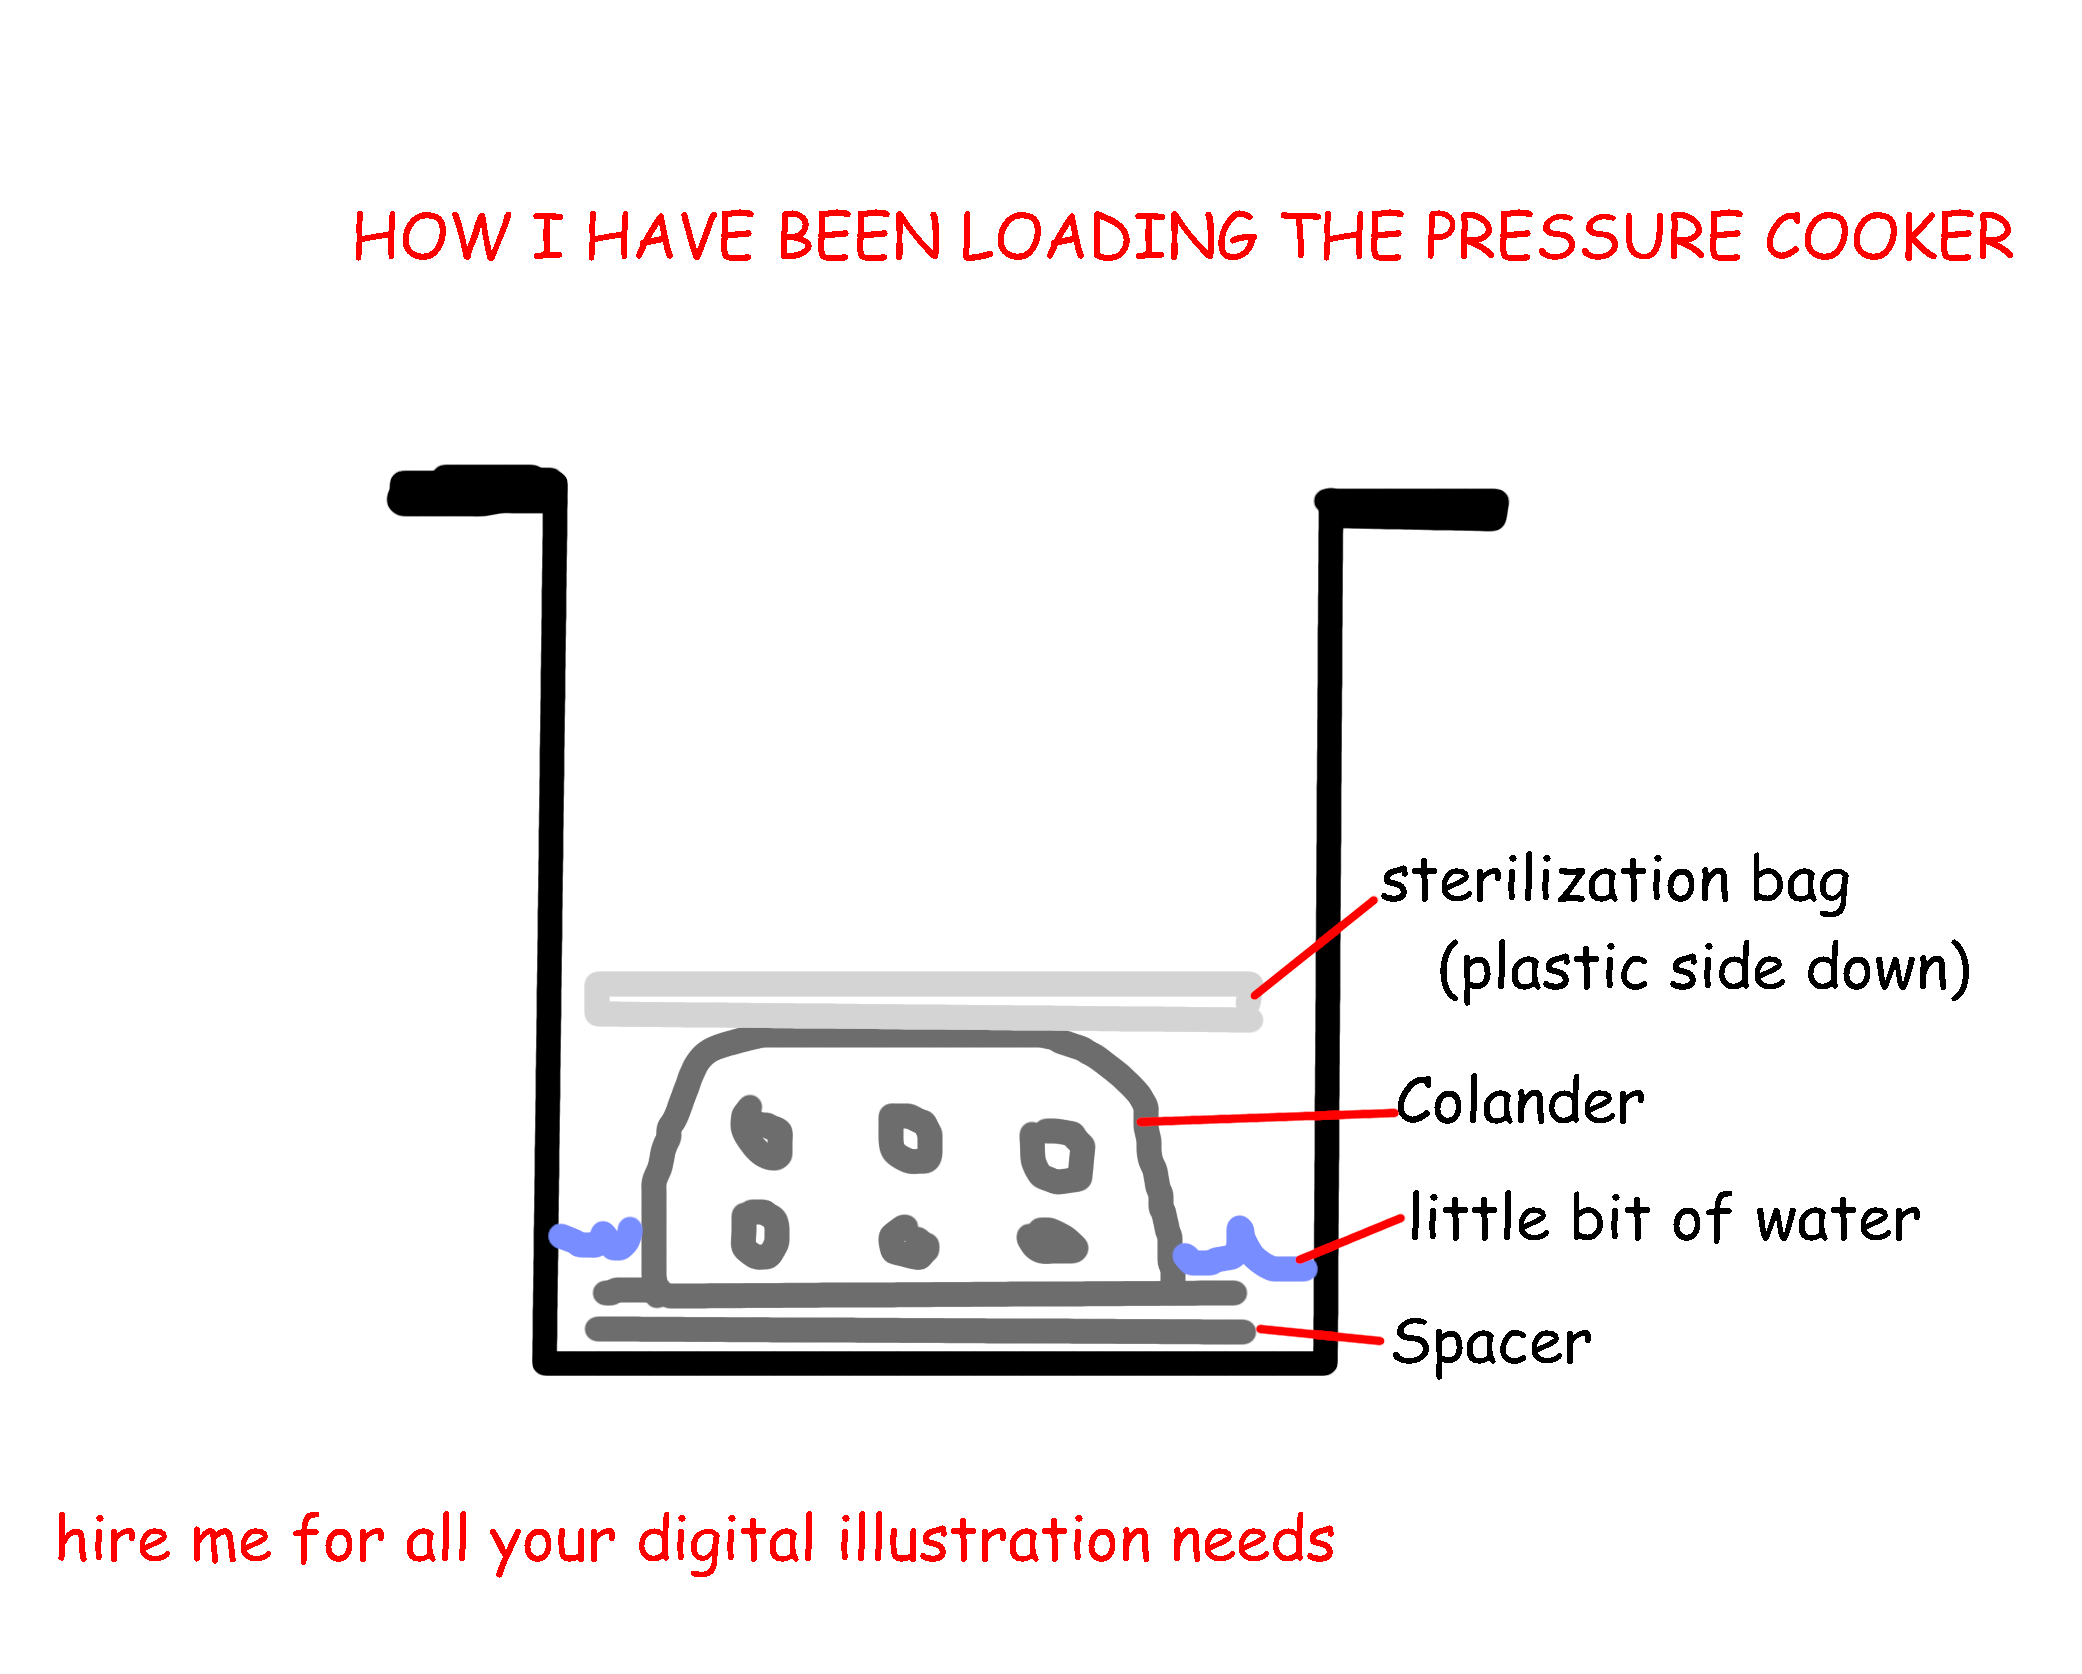
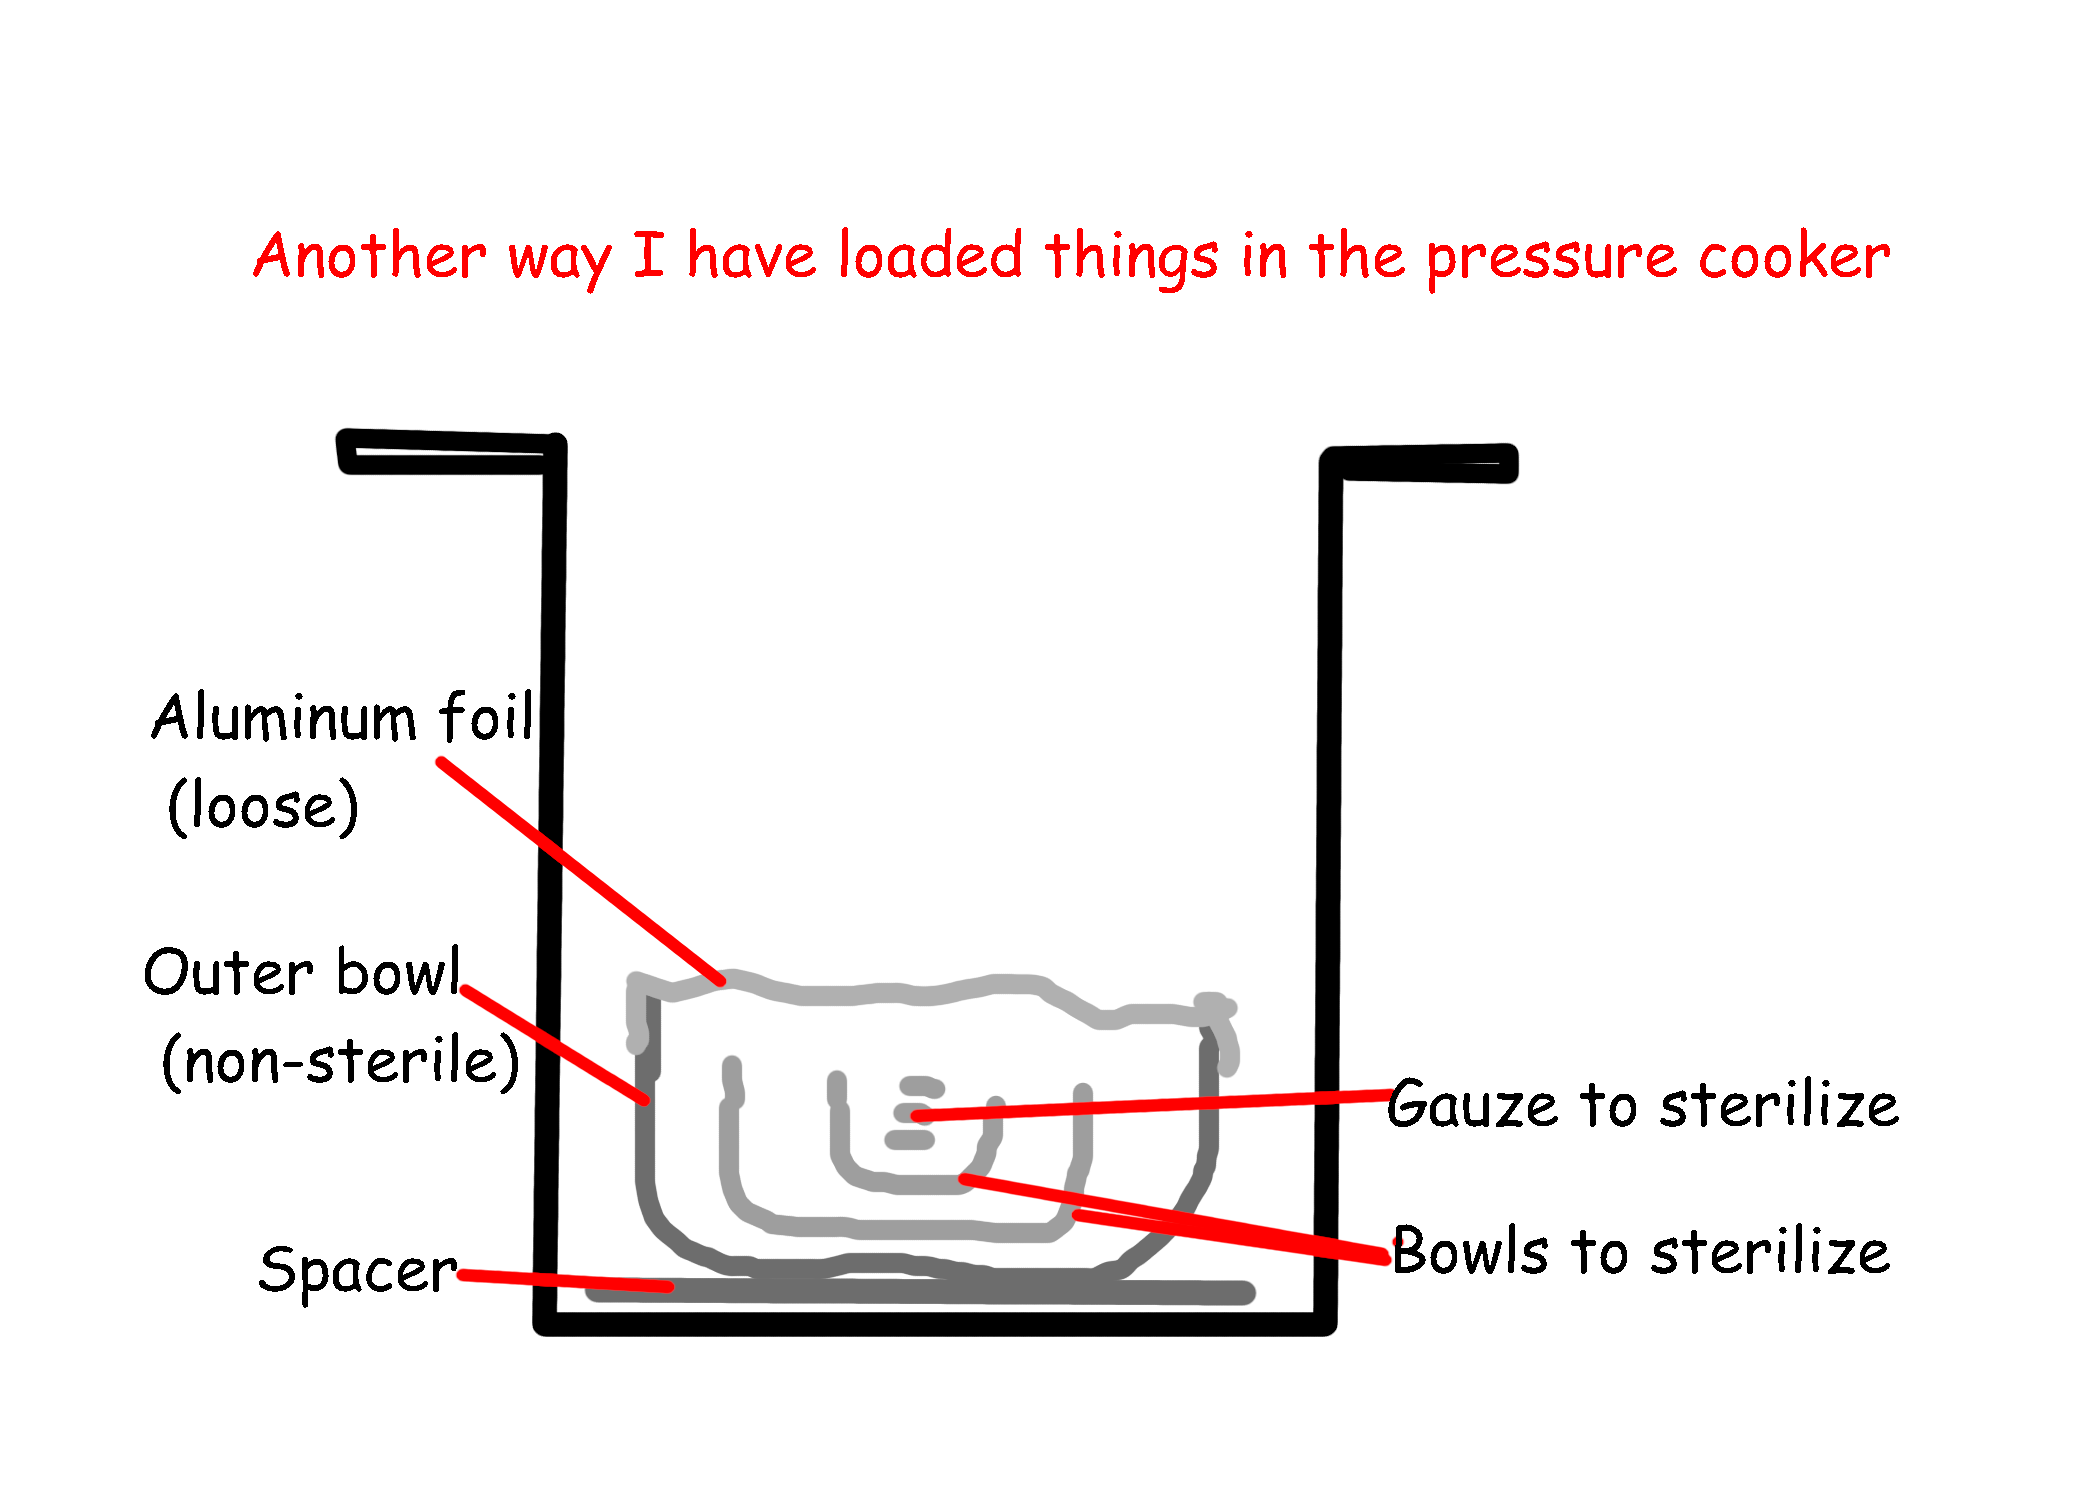
- You don't want water to splash into the things you're sterilizing. So, you may need to add additional spacers. If you're using sterilization pouches, consider using an inverted colander. If you're sterilizing items like bowls and gauze, consider putting them inside a larger metal/glass bowl and loosely covering the lid with aluminum foil.
Diagrams of how to load pressure cooker
- Place prepared articles to be sterilised on the support stand in the cooker. Do not exceed manufacturers recommended load capacity, generally 2/3 full. Ensure there is space around items for the steam to circulate.
- Do not stack pouches horizontally
- If you place a pouch flat, the paper side should face up, and the plastic side should face down. This allows moisture to escape through the paper side (hot air goes up).
- Pouches placed vertically should have enough air between them to allow for ventilation.
- Pouches should not touch the inner sides of the autoclave, as the inside gets hot and can burn them.
- (OPTIONAL; I've never done this.) Grease the point of contact between the lid and the base with silicone grease before each use to ensure a good seal.
- Place the lid on the cooker and ensure it is locked into position and tightly sealed. Start heating the cooker on high heat (it can take it). Let cooker steam for ~10m, in order to evacuate the air from the chamber. When the air has been exhausted, add the weight.
- If steam comes out from around the sides of the lid, turn off heat. Wait until the safety valve clicks down, remove the lid, clean the sealing ring, and try again.
- The correct pressure has been reached when the pressure regulator begins to rock, or the pressure gauge reaches the green sterilisation zone. Start a timer for 60 minutes.
- Reduce heat as necessary so that weight rocks with a low frequency; you don't need it to rattle constantly. (On my stove, this is a little above "medium".)
- When sterilisation time is complete, turn the heat off and allow the pressure to reduce. You can (CAREFULLY) put the pressure cooker in the sink and run cold water over the lid to reduce pressure faster.
- Sterilized items should be allowed to cool and dry before handling. Open cooker and put it in a low-traffic area, away from vents. Be aware of possible perforations in the pouches.
- Packages should not be touched until they are cool because a hand can act as a point of condensation for the warm water vapor emanating from the package, thereby creating a moist area on the outside of the package. This moist area can act as a wick to draw bacteria from the hands into the package. (ANSI/AAMI ST79:2017)
- Placing the pressure cooker in a low-traffic area reduces exposure of the items to particles settling from the environment and minimizes the possibility of inadvertent personnel contact with the sterilized items when they are especially vulnerable to contamination. (ANSI/AAMI ST79:2017)
- Placing a warm pack on a cool surface could cause condensate to form, resulting in contamination of the pack. (ANSI/AAMI ST79:2017)
- Remove pouches and decant items onto sterile field.
- Remove all water from the cooker prior to storing. Store in a dry area.
References
Additional Notes
It's possible there's a better solution than sterilization pouches, e.g. wrapped, perforated trays. The pouches tend to tear. Or maybe I'm just using cheap pouches. It'd be nice to not have to do this day-of.